Update to a new version or branch
Build yourself instead of download
AAPS is not available to download, due to regulations concerning medical devices. It is legal to build the app for your own use, but you must not give a copy to others! See FAQ page for details.
Important notes
Please update to the new version of AAPS as soon as possible after a new release is available.
When a new release is available, in the AAPS app itself, you will receive an information banner about the new version.
The new version will also be announced on Facebook at the time of release.
Following the release, please read the Release Notes in detail, and clarify any queries with the community on Facebook or Discord, before proceeding with the update.
You need to use version Hedgehog (2023.1.1) or Iguana (2023.2.1) of Android Studio. If your version is older, please update first Android Studio first!
Overview for updating to a new version of AAPS
Export your settings from the existing AAPS version on your phone. You might not need it, but better be safe than sorry.
Update local copy of the AAPS sourcecode (Git->Fetch and Git -> Pull)
Transfer the built apk to your phone and install it
Check the version in AAPS
Depending on your BG source make sure to identify receiver in xDrip or use the ‘Build your own Dexcom App’.
In case you experience problems, see separate page for troubleshooting Android Studio.
1. Export your settings
See the Export & import settings page if you don’t remember how to do this.
2. Update your local copy
WARNING
If you update from versions prior to 2.8.x, please follow the instructions to do a New clone, as this guide will not work for you!
Open your existing AAPS project with Android Studio. You might need to select your project. (Double) click on the AAPS project.
In the menu bar of Android Studio, select Git -> Fetch
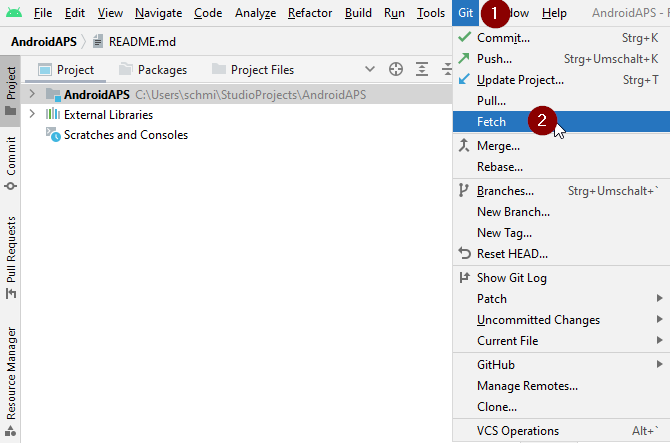
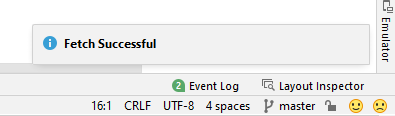
You will see a message in the lower right corner that Fetch was successful.
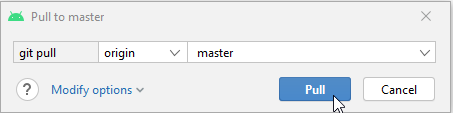
In the menu bar, now select Git -> Pull
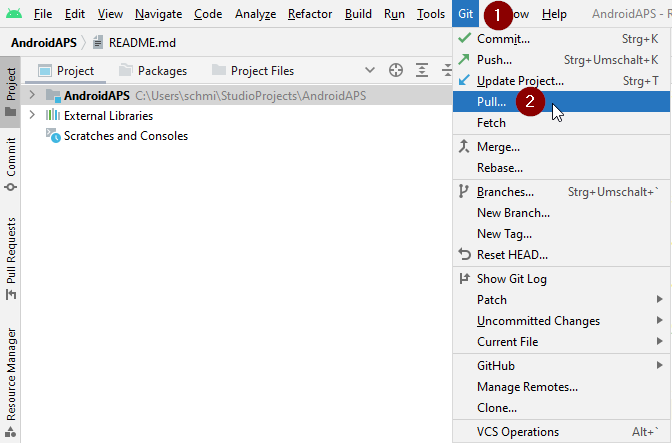
Leave all options as they are (origin/master) and select Pull
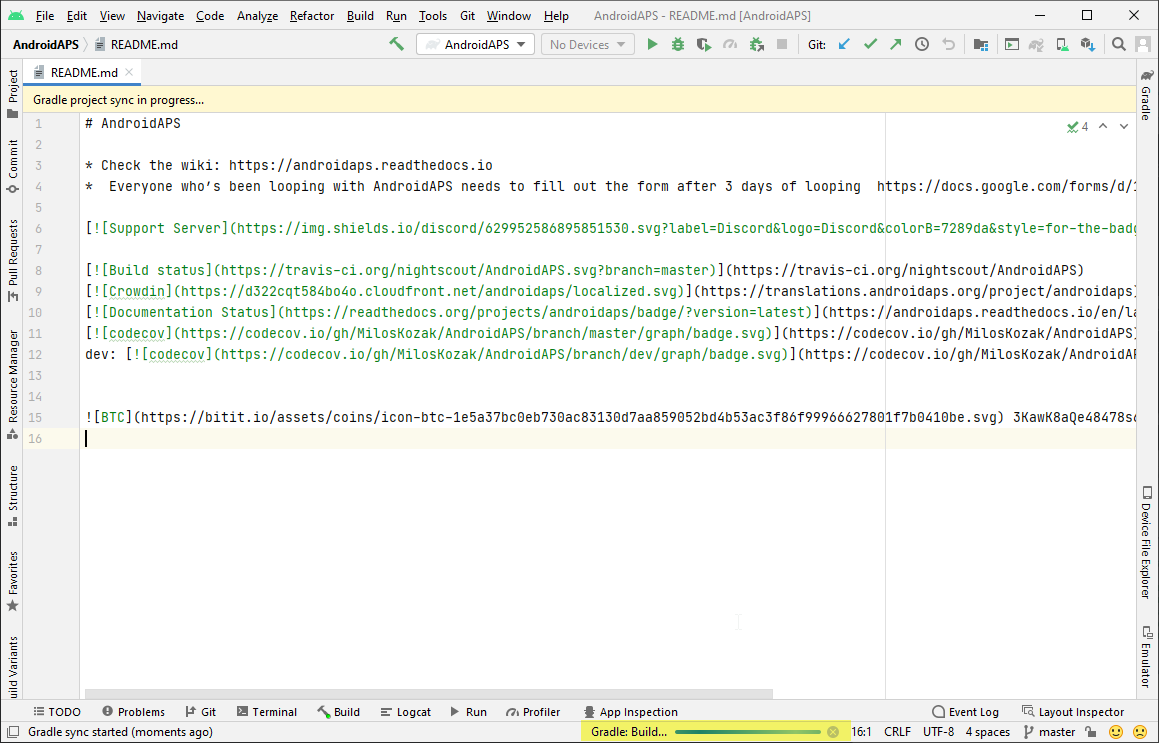
Wait while download is in progress, you will see this as info in the bottom bar. When it’s done, you will see a success message. Note: The files that were updated may vary! This is not an indication

Gradle Sync will be running a couple of seconds to download some dependencies. Wait until it is finished.
3. Build the Signed APK
Your sourcecode is now the current released version. It’s time to build the signed apk from it as described in the build signed apk section.
4. Transfer the apk
You need to transfer the apk to your phone so you can install it.
See the instructions for Transfer APK to smartphone
5. Install apk
On your phone you have to allow installation from unknown sources. Manuals how to do this can be found on the internet (i.e. here or here). Note: If you completed the build with the same existing key store in Android Studio, then you do not need to remove the existing app on your phone. When you install the apk, follow the prompts to install updates. For other scenarios such as establishing a new key store in Android Studio for your signed apk, you will need to delete the old app before installing the apk.
6. Check AAPS version on phone
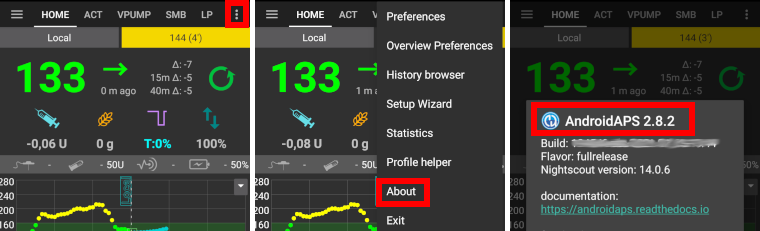
After you installed the new apk, you can check the AAPS version on your phone by clicking the three dots menu on the top right and then About. You should see the current version.
Troubleshooting
If anything goes wrong, don’t panic.
Take a breath!
Then see the separate page troubleshooting Android Studio if your problem is already documented!
If you need further help, please reach out to other AAPS users on Facebook or Discord.