Pumps and cannulas
Changing infusion sets: insulin reservoirs and cannulas
The procedure described below is for tubed pumps only and does not apply to patch pumps like Omnipod, Medtrum Nano, Accu-Chek Solo etc. This procedure is sometimes referred to as a “set change”, with a “full” set change including the insulin reservoir and cannula, and a “partial” set change referring to a change of cannula only.
Patch pumps fill and prime themselves in their own activation wizard, and their cannula is already in the body. AAPS does not offer a prime for them: Prime/Fill is not shown in the Manage sheet or in QuickLaunch. See the page of your pump in Compatible pumps.
Physical cartridge/reservoir changes cannot be done via AAPS and have to be carried out via the pump directly. These need to be logged in AAPS manually, once completed.
Guide for changing both the pump reservoir and cannula
In AAPS, disconnect the pump: press the loop icon on the main screen and select Disconnect pump for 1 hour. The icon changes to a grey plug icon, indicating that the pump is disconnected.
Physically change the insulin reservoir: physically disconnect your pump from the body, and change the reservoir/cartridge and cannula as per manufacturer’s instructions.
Prime/fill the tubing and cannula: this can be done directly on the pump. Be sure to eliminate any bubbles in the tubing.
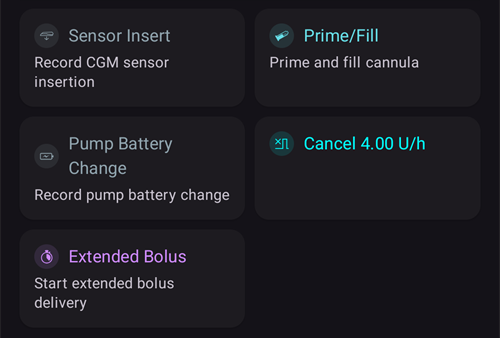
Attach the new cannula to the body. Once the cannula is inserted and the needle is removed, the attached cannula now has a small air gap which also needs to be primed. To announce this in AAPS and prime the site: open Prime/Fill (in the expanded status panel on the main screen, in the Manage sheet, or as a QuickLaunch button) and tick Record pump site change and/or Record insulin cartridge change as appropriate to record the change. Now press the default insulin cannula prime amount (it is usually around 0.3 U, but check this value is correct for your cannula) and select OK. Read the summary message, and confirm to execute the priming by tapping OK.
Reconnect the pump in AAPS: press the grey plug icon and select Reconnect pump to continue looping.
Useful information concerning insulin/cannula changes
Logging a pump site change resets Autosens to 100%. It also resets the corresponding cannula/insulin status lights and ages on the AAPS main screen.
You can set/adjust the default prime amounts in the Prime/Fill settings — type “prime” in the main screen search bar to open them (see Preferences). See your instruction booklet in your cannula box for how many units (depending on needle length and tubing length) should be primed for your cannula.
Insulin delivered using the prime function is not taken into account by AAPS when calculating insulin on board (IOB), and is marked in the Treatments history as “Prime”.
Any insulin bolused from the pump during a pump disconnection will also not be taken into account by AAPS. If you happen to bolus directly from the pump while AAPS is disconnected, once you reconnect the pump you can announce this insulin (without bolusing it) in the Insulin dialog (see To announce delivered insulin without actually bolusing below).
Cannula, infusion site, tubing and/or pump issues
If you are confident that you haven’t received any insulin for a period of time, despite AAPS recording that you have, and you know exactly when the issue started (e.g. you remove the cannula and see that the cannula was kinked during the insertion process) you can correct this in AAPS, while being aware that the insulin may in fact have been delivered but may be slow to act for some reason.
Caution - Risk of Hypoglycemia
Only delete insulin delivery from AAPS with EXTREME caution, in case insulin has actually been delivered, and monitor BG closely for the next 24 h.
To remove boluses and SMBs which you know have not been delivered, open the menu (☰), select Treatments history and, on the Carbs and bolus tab, conservatively delete the logged boluses starting from the point the incident happened. This will correct the “insulin on board” (IOB) value which is key for AAPS’ calculations; if you now return to the main screen you will see that the IOB has reduced. Be aware that you cannot delete basal insulin which AAPS calculates to have been delivered, so that will still be taken into account by AAPS.
In less obvious cases of insulin delivery problems e.g. leakages, occlusions or tunneling where either you are not sure when the issue started, or think some of the insulin was delivered, you need to be careful. You may detect these issues either by “smelling” the insulin, seeing a wet adhesive, encountering high glucose values or by getting an alarm. As you will never know how much insulin you got into your skin (which might be starting to work after a while) it will be hard to determine the correct amount of insulin which needs to be deducted from the current “insulin on board” (IOB) value. One strategy is to pause looping for 5 hours (or your specific duration of insulin action) after you resolved the insulin delivery problem, and resume looping afterwards. This will ensure that IOB is correct once you restart looping.
Disconnecting the pump for showering or activity
If you take your pump off for showering, bathing, swimming, contact sports or other activities you must let AAPS know that no insulin is being delivered, to keep the IOB correct. The pump can be disconnected using the loop icon on the main screen: press it and select Disconnect pump with the duration you need. If the activity takes longer than planned, open the same dialog again and pick a new duration under Disconnect pump: the disconnection is extended and the new duration starts from now. You do not need to reconnect first.
As you are not getting any insulin while the pump is disconnected, you should reconnect every two hours to catch up for the missing basal. You can do this by connecting, bolusing the missing basal amounts (e.g. of the last two hours) before disconnecting again. This should help to avoid a severe lack of insulin which could result in diabetic ketoacidosis (DKA). If it is inconvenient to reconnect the pump during activity (cannula site is covered by wearing a wetsuit etc.), consider a pen injection instead. This manual injection can be logged in AAPS, and doesn’t have to be logged at the time of injection (just make a note of the time of injection) since you can announce the insulin and backdate the time the insulin was actually given when you reconnect the pump.
To announce delivered insulin without actually bolusing
To announce insulin delivered from the pump either while AAPS was disconnected, or from pen injections: open the Insulin dialog (Treatments in the bottom navigation, or a QuickLaunch button), enter the amount in units and enable Bolus will be recorded only (not delivered by pump). A Time row (set to Now) then lets you record the actual time of the injection: you can ignore it if the injection was given recently. If the bolus was given some time ago, use - to move the time back (e.g. -30 min), or open the row with the chevron to pick the exact date and time. AAPS will then take into account the duration of insulin action and calculate the remaining insulin still in the system accordingly.
If you are using AAPS as a caregiver, you can remotely disconnect (and reconnect) the pump very easily by SMS command using commands such as “pump disconnect 120” and “pump connect 120”. The range of duration for remote disconnect is from 1 - 120 min, (in this example it is 120 minutes). This is very useful if the AAPS handset is inconvenient for you to access, buried in a pump belt on a kid who is running off towards the swimming complex, or being closely guarded (or in use) by a teenager.
Reconnecting the pump after activity
After a long disconnection (1 - 2 hours) it is fairly common for AAPS to calculate that you now have negative IOB. When you reconnect the pump, depending on preference/current glucose level/planned food or subsequent activity, you can either:
a) Just reconnect the pump in AAPS (grey-to-green, for closed loop) and leave it up to AAPS to start to deliver insulin again
or
b) If you want to be more aggressive (for example, you are heading for hyperglycemia), you can open the Bolus wizard and bolus for zero carbs, to immediately deliver the calculated missing insulin as a bolus.
Which strategy you prefer is highly personal, and is best determined by trial and error.
Site Rotation
Manage → Site Rotation opens the Site Rotation Dialog in View mode:
With the two buttons at the top (cannula icon and sensor icon), you can show Cannula sites only, Sensor sites only, or both
All Cannula change and Sensor change events from the past 45 days are available.
Click on a Site area, or in one entry in the list below to filter the list with only entries in selected area. The selected area will be highlighted in light green color.
Tap the pencil icon next to an entry to open the Edit view and update its Site location, Arrow or Note

The cog icon (upper right) opens the settings: User profile for site rotation opens a dialog where you choose Man, Woman or Child, and the Manage pump site rotation and Manage CGM site rotation switches select which sites you manage.


Note: this setting decides whether the Site Rotation dialog (Edit mode) opens automatically when a new entry is made with the “Prime/Fill” button or the “Sensor Insert” button.
For Site change done directly from Pump, you have to open the View Mode and Edit the new entry to select Location and Arrow
Edit Mode allows you to select Location, Arrow, and Note associated to selected Entry:
The entry being edited is shown below the body images, with its type icon (cannula or sensor)
Front and back views are shown side by side: tap the area where you placed it
Once a site is selected (highlighted in green), the list below shows all entries made in this site in the past 45 days.

You can add an optional arrow by tapping the arrow icon at the right of the entry: the Select Arrow dialog lets you specify a sub-location or the pod orientation

You can also add a Note about the selected site
Tap the save icon (upper right) to record the site
Filtering can be done graphically on the image, or clicking a therapy event in the list To remove filtering, just click on the image outside any sites
