Remote control of AAPS
There are four highly effective tools for remotely managing AAPS:
SMS commands (follower phone can be either Android or iOS),
AAPSClient (follower device is an Android phone or tablet, or a Windows, Mac or Linux computer; on an iPhone you build the app yourself)
Nightscout (Android, iOS or other computer/device), mainly for following: see the note on client control in that section.
Smartwatches (Android)
The first three are mostly appropriate for caregivers/parents, but smartwatches are very useful for caregivers/parents and for adults with diabetes themselves.

1) SMS Commands
See the dedicated SMS Commands page.
2) AAPSClient
AAPSClient looks very similar in appearance to AAPS itself, offering the caregiver the same screens and buttons to send commands remotely to AAPS:

About AAPSClient, AAPSClient2 and AAPSClient3
There are 3 versions of the client app: AAPSClient, AAPSClient2 and AAPSClient3. They work the same way. The only difference is that they can be installed side by side on the same follower phone.
A caregiver who follows one person needs only AAPSClient. To follow and remote control a second person (with their own Nightscout site and their own AAPS phone), install AAPSClient2 as well, and AAPSClient3 for a third person. Each app is set up and paired on its own, with the Nightscout site and the AAPS phone of the person it follows.
To tell the apps apart, some elements have a different color: yellow for AAPSClient, blue for AAPSClient2 and green for AAPSClient3. Those elements are the app icon, the widget background, and the AAPS status section on the home screen of the app.
Note: the opacity of the widget background can be set in the widget configuration. At a low opacity the color is hard to see.

Download and installation
AAPSClient can be installed on a single phone or multiple follower phones (i.e. parent 1’s follower phone and parent 2’s follower phone) in order for both caregivers to be granted access and remote control a patient’s AAPS phone.
To download AAPSClient, navigate to the GitHub repository and click on the asset “app-AAPSClient-release_x.x.x.x” (it may be a newer version to that shown in the screenshot below):

Then go to downloads on your computer. On Windows, downloads will show in the right hand ribbon:

Once downloaded, click show in folder to locate the file.
The AAPSClient apk can now be either:
Transferred by a USB cable onto the follower phone; or Dragged into Google drive folder, and then added onto the follower phone by clicking on the “app-AAPSClient-release” file.
Should you be needing AAPS for yourself, and AAPSClient for monitoring someone else, you will need to build AAPSClient yourself instead of downloading it from the GitHub repository as described above. The reason is that you can’t install both AAPS and AAPSClient on the same phone, signed by a different key.
To build AAPSClient yourself, follow the same process as regular AAPS build. On the Generate signed App Bundle or APK page, select aapsclientRelease instead of fullRelease.
The same rule applies when you install several client apps (AAPSClient, AAPSClient2, AAPSClient3) on one follower phone: they must all be signed with the same key. Otherwise Android refuses to install the second one (error INSTALL_FAILED_DUPLICATE_PERMISSION).
Synchronization: AAPSClient and AAPS set up
Once the AAPSClient apk is installed on the follower phone, make sure NSClientV3 is set up the same way on both phones for Nightscout 15 (see the update notes). The example below shows the synchronization set-up with NSClientV3 and Nightscout 15; other data sources are available in AAPS (e.g. xDrip).
In Configuration > Communication, the user synchronizes their data with Nightscout through NSClientV3 (using the v3 API), set up the same way for both AAPS and the follower phone.

The user must ensure that both the AAPS and AAPS Client phones are synched together by setting up NSClientV3 on each. On the follower phone this can be done by scanning a QR code shown by AAPS instead, see Pairing AAPSClient with AAPS below:
Enter your Nightscout URL in the NSClientV3 Settings
Enter your Nightscout access token in the same settings. Please follow the notes here. On the AAPS phone use an admin token: with it AAPS makes a token of its own for each follower phone.
Enable Use websockets on both phones. Websockets are mandatory for remote control from AAPSClient, on both phones. Without them, AAPSClient can follow AAPS but cannot control it. On both phones they also make synchronization faster, at the cost of slightly higher battery use.
Your Nightscout host must support websockets. If the websocket connection keeps dropping, remote control does not work. See Troubleshooting NSClient.

The user should ensure that both AAPSClient and AAPS are showing ‘connected’ in the NSClientV3 screen of each phone. At this point AAPSClient follows AAPS (BG, treatments, profile), but it cannot control it yet: pair the two phones as described below.
Pairing AAPSClient with AAPS (remote control)
From AAPS version 4, AAPSClient controls AAPS through a secure, paired connection. Synchronization alone is not enough: until the phones are paired, AAPSClient only shows Manage with a view-only Profile and Pair with master.
On the AAPS phone, open Manage → Authorized clients and turn on Allow client control (it is off by default, and always on in Simple Mode).
Tap +, enter a name for the follower phone, choose how it is set up and choose its role:
QR code: Nightscout and pairing — AAPS shows a QR code that sets up Nightscout on the follower phone and pairs it, in one scan. This needs an admin token in the AAPS phone’s NSClientV3 settings.
PIN — for a follower phone without a camera, already connected to Nightscout: note the one-time PIN (valid for about two minutes).
On the AAPSClient phone, scan the code (in the Setup Wizard, or Manage → Pair with master → Scan QR code), or open Manage → Pair with master and enter the PIN. Confirm.
The follower phone then appears as Active in the Authorized clients list, and AAPSClient shows Treatments, Scenes and Manage. The follower phone gets a Nightscout token of its own, with only the rights it needs. The full procedure, with screenshots and troubleshooting, is on Master ↔ Client control.
Check that the set-up works: enter carbs on AAPSClient, confirm the amount shown, and check that the entry appears in Treatments on both phones.
Troubleshooting ‘Nightscout access token’ configuration issues
The precise ‘Nightscout access token’ configuration may differ depending upon whether your Nightscout provider is a paid for hosted site or not.
If you are struggling with AAPS to accept the ‘Nightscout access token’ and using a paid for hosted Nightscout site, you may wish to first liaise with your Nightscout provider on how to resolve the ‘Nightscout access token’ difficulties. Otherwise, please reach out to the AAPS group but please double check that you have correctly followed the notes before doing so here.
What AAPSClient offers
Once paired, AAPSClient offers the caregiver almost the same screens as AAPS itself:
Treatments: insulin bolus, carbs and the bolus wizard.
Scenes: start and stop scenes.
Manage: profiles, insulin settings, temporary targets, QuickWizard, automation, food, site rotation, pairing and the running temp basal.
Main menu: treatments history, history browser, statistics, maintenance, configuration.
There is no pump and no objectives on AAPSClient. See The AAPSClient app for a detailed description.
AAPSClient lets the caregiver make most of the adjustments allowed directly in AAPS, including insulin boluses, remotely over the mobile or internet network. Every command is signed and sent through Nightscout to the AAPS phone, which checks it against its own data, caps it, shows you its own confirmation, and only then executes it. AAPSClient can be much faster than SMS Commands, especially for commands that would need authentication.
Treatments entered in Nightscout by other means (for example the Nightscout website) are not applied while client control is on: AAPS is then in hardened mode and takes changes only from paired clients. With client control off, they are applied only if the matching Receive options are enabled in the Synchronization section of NSClient preferences.
Remote control through AAPSClient is only recommended if your synchronization is working well (i.e. you don’t see unwanted data changes like self-modification of TT, TBR etc).
AAPSClient with smartwatch options
A smartwatch can be a very useful tool for helping to manage AAPS with kids. A couple of different configurations are possible. If AAPSClient is installed on the caregiver’s phone, the AAPSClient WearOS app can be downloaded and installed on a compatible smartwatch which is connected to the parent’s phone. This will show current BG and loop status. Once AAPSClient is paired with AAPS, the watch actions (including boluses, carbs, temp targets and profile changes) are relayed through AAPSClient to AAPS, which confirms and executes them: see Wear OS on a client. You can read more about Smartwatches here.
3) Nightscout
As well as Nightscout being a server in “the Cloud”, there is also a dedicated Nightscout app which can be downloaded directly from the App Store on your iPhone. If you have an Android follower phone, there is not a dedicated Nightscout app and it is better to use AAPSClient, or, if you only want to follow, and not send treatments you can download and install the Nightwatch app from the Playstore.
Once you have installed the Nightscout app on your iPhone, open the app and follow the set-up prompts, entering your Nightscout address (see below, left). The form of this may vary depending on how your Nightscout is hosted. (e.g. http://youraddresshere.herokuapp.com). Then enter your Nightscout API secret (see below, right). If not prompted for your API password, then you need to enter this by clicking on the padlock at the top of the app:

More info on setup is available directly from Nightscout
When you first log in, you will have a very simple display. Customize the display options, by selecting the “hamburger” in the top right and scrolling down:

Scroll down through to “Settings”. You may wish to change the “scale” to “linear” as the default for the BG display is logarithmic, and under “render basal” select “default” so that the pump basal shows up.

Select your desired options. Uncheck alarms if you use an alternative app for alarms.

Continue to scroll down until you get to “show plugins”.
You need to make sure “careportal” is checked, and can also select various other metrics (most useful are: IOB, care portal, pump, cannula age, insulin age, basal profile and OpenAPS).
Importantly, you now need to click “save” at the bottom for these changes to take effect.

After pressing “save” the app will return to your main Nightscout screen which will look a little like this:
Current glucose value
Information on AAPS system status - touch the individual tabs on the screen to display more detail. Add or remove these display options using hamburger menu.
Recent glucose trace with treatments (carbs, boluses) displayed
Longer-term glucose trace
“Hamburger” menu for setting display options, generating reports, editing profiles and Nightscout admin tools
“+” menu for entering treatments (see below for when AAPS applies them).
Select different time period to display
Basal insulin profile
Green line = historical glucose Blue lines = predicted glucose

Looking in more detail at the top left menu of the Nightscout app:
Careportal retrospective edit
Turn on/off alarms
Hamburger - for setting preferences
Careportal - Log treatment (see below for when AAPS applies these)

There is a huge amount of information on the status of the AAPS system in the grey tabs (and even more information is revealed if you tap the tab) on this screen:
5min glucose trend
Bolus wizard preview
Press on Basal to see your current profile and basal information
Time since latest CGM reading in AAPS
Pump: insulin, battery % and when AAPS last connected to it
Last time AAPS refreshed - if this is longer than 5 mins it can indicate a connection issue between AAPS phone and pump/CGM
Press on IOB to see split of basal and bolus insulin
Insulin age in reservoir
Cannula age
Battery status of AAPS phone
Size of your database. If it gets too full (DIY Nightscout only - hosted services just ignore) you may start having connectivity issues. You can delete data to reduce the size of the number in the Admin tools menu (via hamburger).


Press “refresh” at the bottom of the page to close the popup.
Sending treatments through the Nightscout app to AAPS
In AAPS 4 the supported way to control AAPS remotely is a paired AAPSClient, see Master ↔ Client control: each client has a role that limits what it may do, and every command is signed by the client, then checked and confirmed by the AAPS phone. While client control is on, the AAPS phone is in hardened mode: treatments, temporary targets and profile switches entered on the Nightscout website or in the Nightscout app are not applied. The Nightscout app is then a tool for following only.
Only when client control is off
If Allow client control is off in Manage → Authorized clients (and Simple Mode is off), AAPS applies careportal entries from Nightscout only for the data types you turned on under Receive in the Synchronization section of the NSClientV3 settings: carbs, temporary targets, profile switches and the other careportal entries. Insulin is never delivered this way: a “Correction bolus” entered in Nightscout is only announced, and AAPS counts it as insulin on board without delivering it. This set-up is not recommended for remote control; use a paired AAPSClient instead.
Read more about Nightscout options here
Tips for getting the most out of the Nightscout app
1). If you get “stuck” on a page and want to be able to see the main screen again, just click “refresh” (bottom middle) and this will take you back to the Nightscout homepage with the BG graph.
To see the current profile which is running on the phone, press the various icons on the screen above the graph. More info (current carb ratio, sensitivity and timezone etc.) can be seen by pressing “basal” and “OpenAPS” gives info about the profile and current target etc. Both the phone battery% and the pump battery % can also be monitored. BWP gives information on what the algorithm thinks will happen in the future, given the IOB and COB.
4) Smartwatches
Option 1) Controlling AAPS from a Wear OS Watch

Once you have setup AAPS on your watch, extensive details about the smartwatch faces and their functions can be found in Operation of Wear AAPS on a Smartwatch.
As a brief overview, the following functions can be triggered from the smartwatch:
set a temporary target
use the bolus calculator (calculation variables can be defined in settings on the phone)
administer eCarbs
administer a bolus (insulin + carbs)
watch settings
status
check pump status
check loop status
check and change profile, CPP (Circadian Percentage Profile = time shift + percentage)
show TDD (Total daily dose = bolus + basal per day)
Remote bolus where the caregiver and T1D child are in different locations (this is possible for the AAPS watch and AAPS phone providing both devices are connected to the network)
Communication from caregivers to the watch using other apps (like WhatsApp)
It is possible to add additional apps to the watch, like WhatsApp, for messaging (for example) between caregivers and kids. It is important only to have ONE Google account associated with the phone, or the watch will not bring this data across. You need to be 13 or older to have a Samsung account, and this needs to be set up in the same email address which is used on the Android phone.
A video explaining getting WhatsApp setup for messaging on the Galaxy 4 watch (you can’t get full functionality of WhatsApp) is shown here
Making adjustments in both the Galaxy wearable app on the AAPS phone and the watch makes it possible for WhatsApp messages to announce with a slight vibration, and also for the WhatsApp message to display over the existing watchface.
Option 2) AAPS on watch, for remote control of AAPS on a phone
Similarly to using a follower phone with AAPSClient or SMS commands (see the sections above), a smartwatch can be used to remotely control AAPS and provide full profile data. A key difference to using a follower phone is that the smartwatch to AAPS phone link is via Bluetooth and needs neither Nightscout nor an authentication code. As a side-note, if both smartwatch and AAPS phone linked by Bluetooth are also on a Wi-Fi/Cellular data network, the watch will also interact with the AAPS phone, giving a longer range of communication. This includes remote delivery of a bolus where the caregiver with the AAPS watch and T1D child (with AAPS phone) are in different locations, which can be useful in circumstances where the T1D child is in school.
A remote control smartwatch is therefore often useful in any situation where:
a) AAPSClient or SMS commands cannot work; or
b) The user wishes to avoid typing an authentication code (as required for SMS commands).
A smartwatch needs Wear OS 3 or newer to be able to control AAPS. Please check the technical specifications of the watch, and see the Smartwatches page. Search, or ask in the AAPS Facebook/Discord groups if unsure.
Specific How-to guides for setting up AAPS on the popular Samsung Galaxy Watch 4 (40mm) are given below. The Garmin watch is also a popular choice. If you have experience of setting up a different smartwatch which you think would be useful to others, please add it into these pages edit the documentation to share your findings with the wider AAPS community.
Option 3) AAPSClient on a watch for remote control of AAPS on a phone

The software for the watch, AAPSClient Wear apk, can be downloaded directly from GitHub.
To download the software, click on the watch app that matches the client app on the phone: wear-aapsclient-release_version goes with AAPSClient, wear-aapsclient2-release_version goes with AAPSClient2 (see About AAPSClient, AAPSClient2 and AAPSClient3):

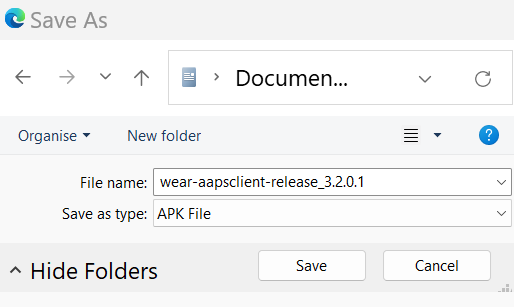
Then “save as” and save the file to a convenient location on your computer:
The AAPSClient wear apk can be transferred to your phone and side-loaded onto the watch in the same way as the AAPS Wear app, as detailed in Transferring the Wear app onto your AAPS phone